Overriding my laundry lid sensor
My laundry machine broke yesterday. The day before Mother’s Day with my wife pregnant enough that few of her clothes fit and a day after she got back from a business trip. I needed to get that load of laundry done by morning.
Problem
The problem was easy to fix with more time. All that was the issue was the door strike had broken off and fallen into an inaccessible crevasse in the washer. The strike needs to be there so that the smart lid lock can sense when the lid is unlocked, when the lid is open, and when the lid is locked. I didn’t know that at the time, but it was clear that the plastic piece was broken.
Fixing it
I didn’t have a new latch though, and I wasn’t going to get one by morning. Time to circumvent the sensor.
Debugging stories are not that interesting, but suffice it to say that I did not have a clear picture of what the problem was or how to fix it setting into this. So the steps below took some leg work to arrive at.
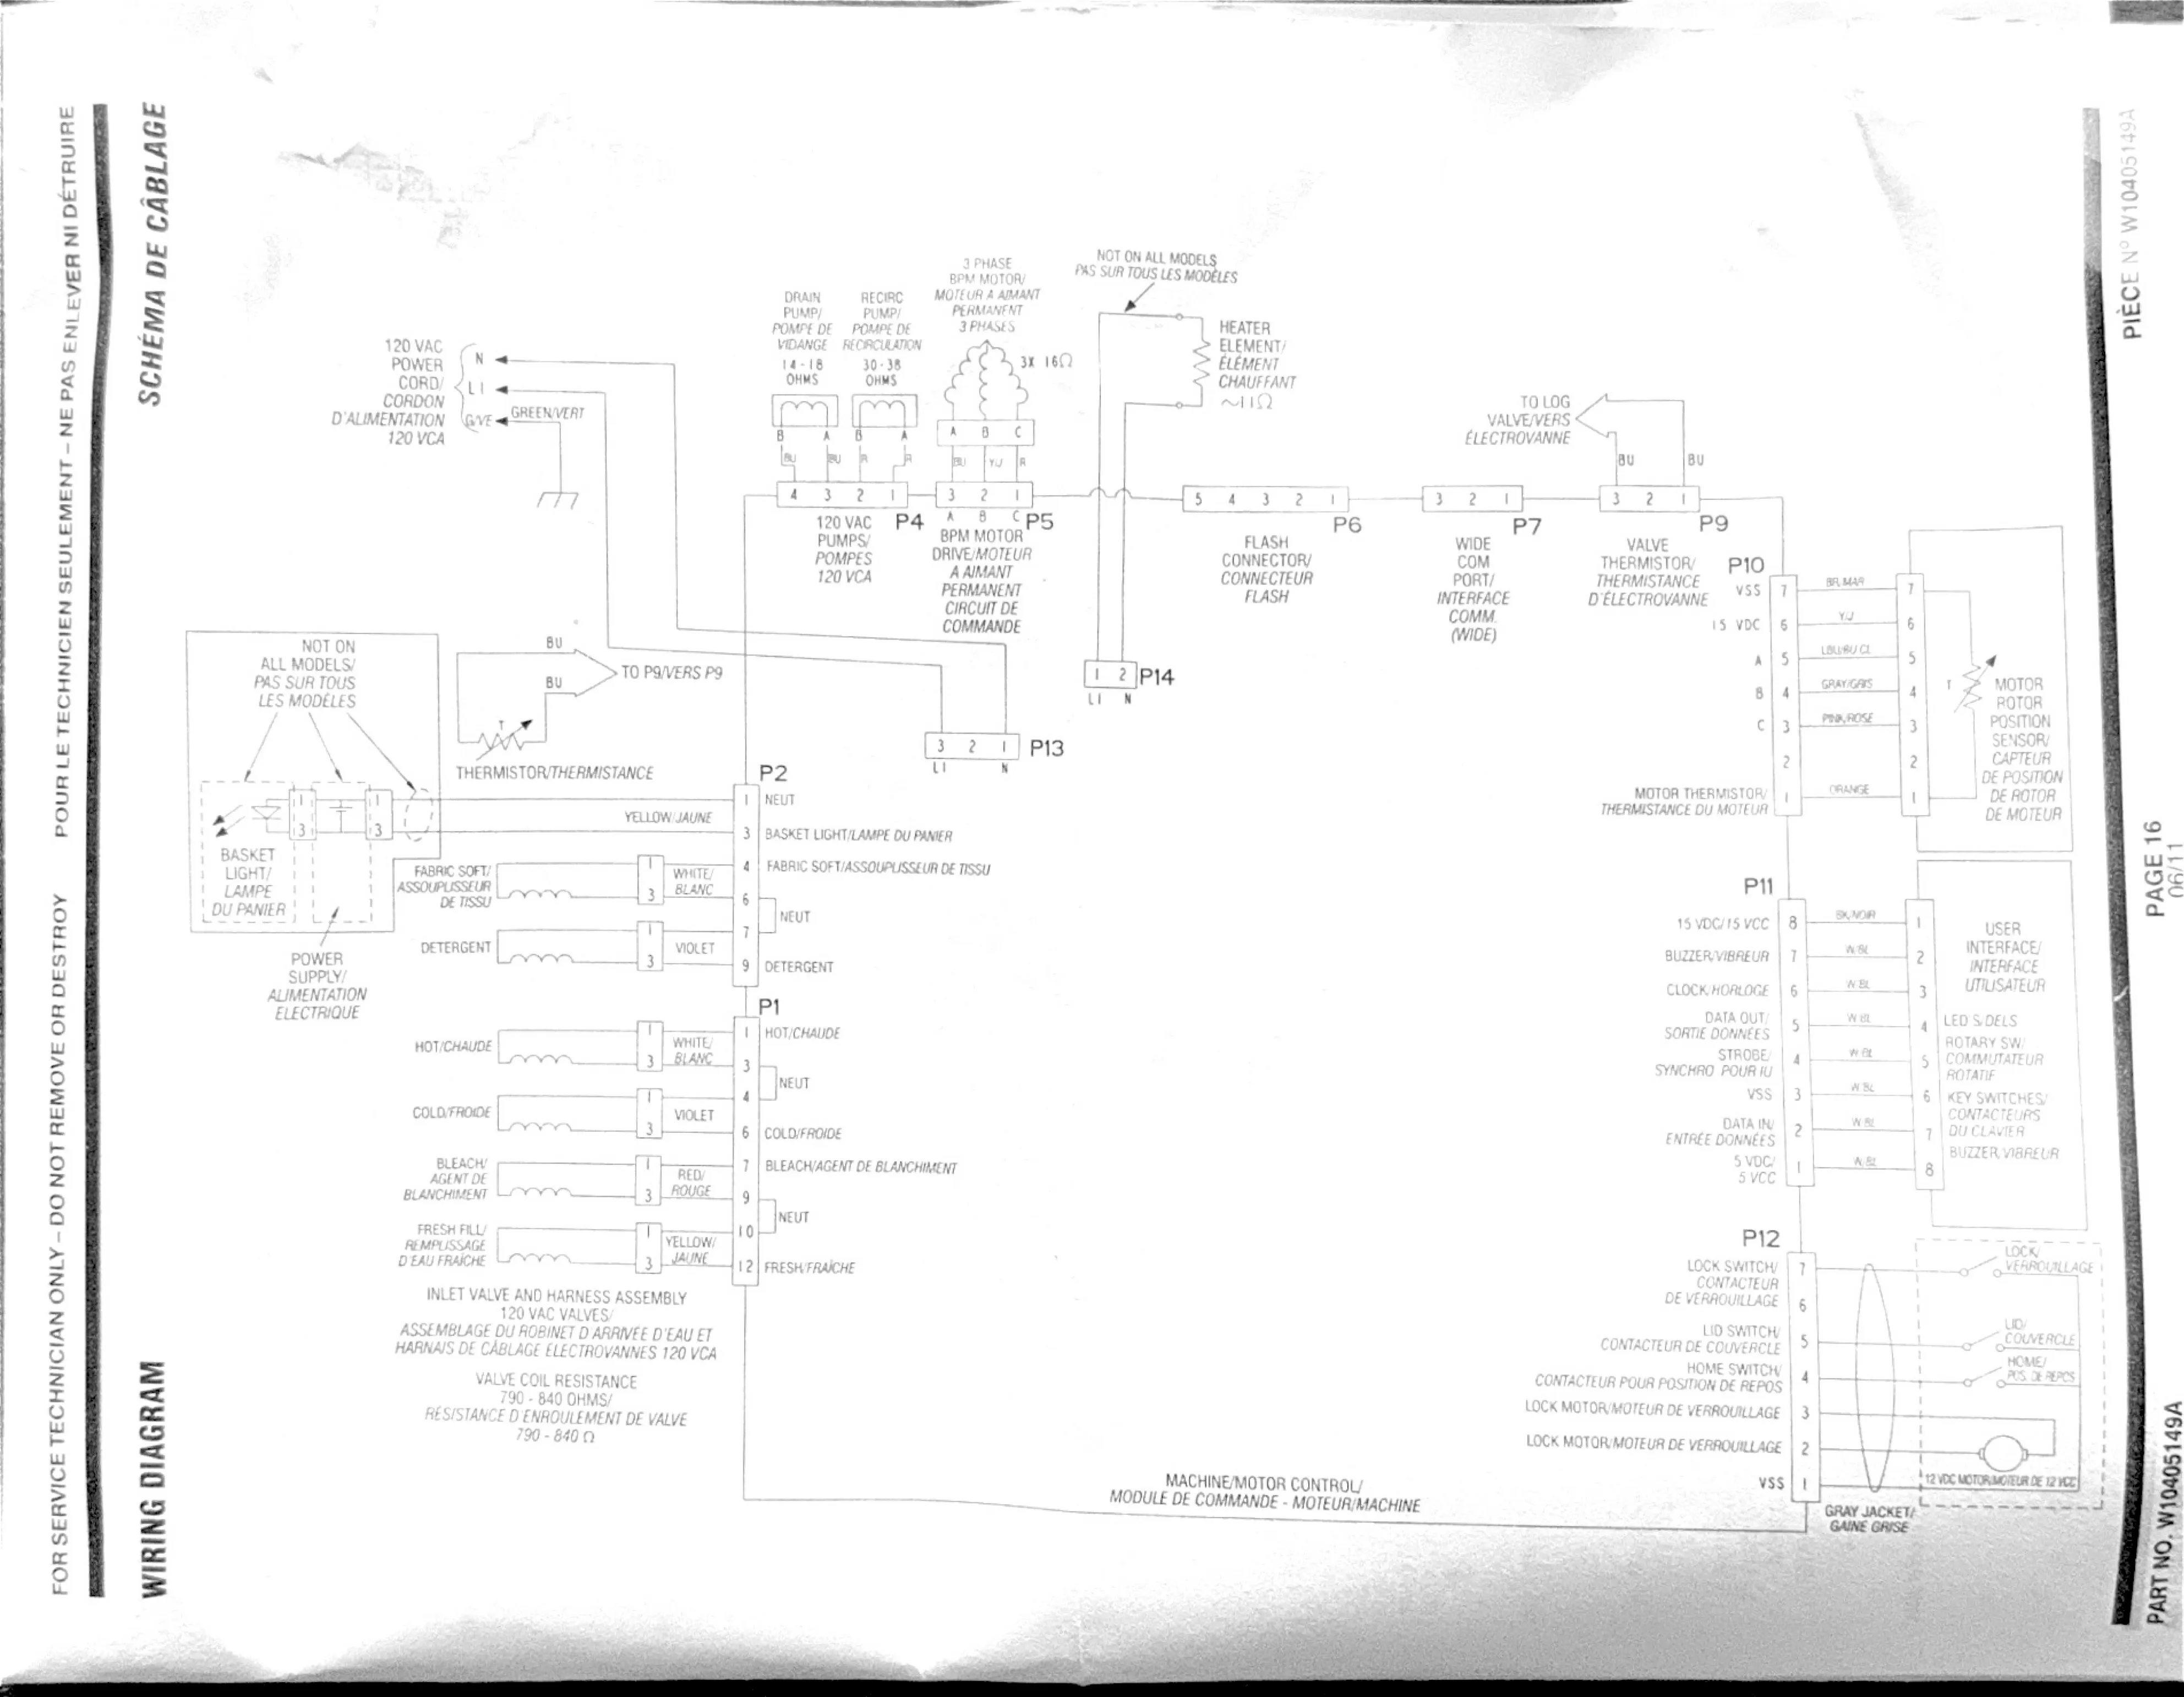
- Opened the control center of the machine. For me, this required loosening 3 screws on the back and then it popped right off with a firm push.
- Identified the wire running from the lock sensor to the control panel. This took a minute because I was expecting a 3-wire plug and this one was 6. But by looking at the jacket of the wire running around the inside of the machine I was fairly certain that the 6-pin plug was the correct one.
- I asked Gemini to tell me what each wire was because there was very little informatin easily findable with a web search. This worked well enough that I was inspired to continue, as I was very close to giving up at this point.
- This is when I cut the plug off the existing sensor line so that I could jump the wires. The socket itself was too small for me to put new wires in, so I needed the leads from the existing plug. This was crossing the Rubicon at 11:30PM.
- There was still some uncertainty on which wire was which. Luckily, the tech spec for professional technicians was taped inside the machine and I could see it and kind of reach it without taking off the panels (which would have been a pain cause the machine is really wedged into its present location)
- Looking at the tech spec confirmed the wiring. This was critical.
Jumping the lock
For the Whirlpool Cabrio Platinum WTW8540BW, jumping the lid/lock sensor can be done as follows:
- Connect the white wire (VSS) to the blue wire (Home). This tells the machine that the lid is properly unlocked.
- Connect the white wire (VSS) to the green wire (Lid). This tells the machine that the lid is closed.
- Be prepared to connect the white wire (VSS) to the red wire (Lock). DO NOT CONNECT THEM YET. The machine gets confused if the unlocked and locked signals are both active.
- Power the machine on
- Start the cycle. A little water will start, then it will stop. When it stops, wait 3-5 seconds. If you go too fast or too slow it will error out, hit the power button until it turns off and start over.
- After 3-5 seconds, disconnect the blue wire from the white wire and connect the red wire and the white wire.
- The cycle should run, but it will error at the end of the cycle when it tries to unlock the lid.
Warning The lid does not lock during this process. Stay safe!!
How I pulled this off with the equipment on hand
Getting the blue wire moved to the red wire while keeping the green wire hot is not something you can do with 2 hands and electrical tape. In an ideal world you could hook up a switch, but I didn’t have one on hand that would work. So I used a breadboard.

- Hooked the white wire to the board’s positive lead
- Spaced out green/blue/red wires so I had room to work
- Hooked the green wire to the positive lead
- Hooked the blue wire to the positive lead
- When starting the cycle, manually moved the pin from the blue wire to the red wire